
How to Clean Your FPV Drone: A Step-by-Step Guide for Peak Performance
Your FPV drone is an athlete. After a muddy, dusty, or grassy session, it needs a proper cleaning to perform at its best and live a long life. Dirt isn't just unsightly; it traps moisture, causes corrosion, adds weight, jams moving parts, and can lead to electrical shorts. This step-by-step guide will show you how to safely and effectively clean your FPV drone, ensuring it's always ready for its next flight.
Why Cleaning is Critical Maintenance
Neglecting cleaning has real consequences:
• Corrosion: Moisture and dirt accelerate corrosion on solder joints, connectors, and metal components.
• Overheating: A thick layer of mud on your ESCs or motors acts as an insulator, trapping heat and leading to premature failure.
• Vibration and Imbalance: Dirt stuck inside a motor bell or on a propeller shaft creates imbalance, leading to excessive vibration, poor flight performance, and "jello" in your video.
• Physical Damage: Grit and sand are abrasive. When forced into bearings or between moving parts, they act like sandpaper, causing rapid wear.
Safety First: Essential Precautions
1. Disconnect the Battery: Always remove the LiPo battery before starting any cleaning. This is non-negotiable.
2. Let it Cool: If you've just finished flying, allow the motors and electronics to cool to room temperature. Thermal shock from cold liquids can damage components.
3. Avoid Harsh Chemicals: Never use solvents like acetone, gasoline, or strong degreasers on plastics, 3D prints, or electronics. They can dissolve parts and strip conformal coating.
4. Protect Sensitive Ports: Be mindful of USB ports, memory card slots, and barometers. Avoid forcing moisture or debris into them.
Your FPV Drone Cleaning Toolkit
Gather these simple, effective tools:
• Soft-Bristle Brushes: Various sizes (paintbrush, toothbrush) for dislodging dry dirt.
• 99% Isopropyl Alcohol: The champion of electronics cleaning. It evaporates quickly, leaves no residue, and is safe for most components. (90%+ is acceptable).
• Compressed Air (Duster): For blowing out dust and debris from hard-to-reach places.
• Lint-Free Microfiber Cloths: For wiping down surfaces and lenses.
• Toothpicks & Wooden Skewers: For carefully scraping caked-on mud without scratching carbon fiber.
• Distilled Water & Spray Bottle (Optional): For initial heavy mud removal, if needed.
• Cotton Swabs (Q-tips): For precise cleaning around solder joints and components.
Step-by-Step Deep Cleaning Guide
Follow these steps in order for a thorough clean.
Phase 1: The Initial Dry Clean (Removing Loose Debris)
Goal: Remove all loose dirt, grass, and dust before introducing any moisture.
1. Remove Props: Take off all propellers.
2. Brush and Blow: Use your soft brushes to gently sweep away dirt from the frame, arms, and around motors. Follow up with short bursts of compressed air. Hold the motor bells still while blowing air into them to force out debris trapped between the bell and stator.
3. Inspect: This is a good time to look for any damage, loose screws, or frayed wires you may have missed.
Phase 2: The Focused Damp Clean (Tackling Stubborn Grime)
Goal: Clean components without soaking the electronics.
1. Clean the Frame and Arms: Dampen a corner of a microfiber cloth with isopropyl alcohol. Wipe down all carbon fiber and plastic parts. The alcohol will cut through light grease and evaporate. For stubborn mud, use a wooden toothpick to gently flick it off.
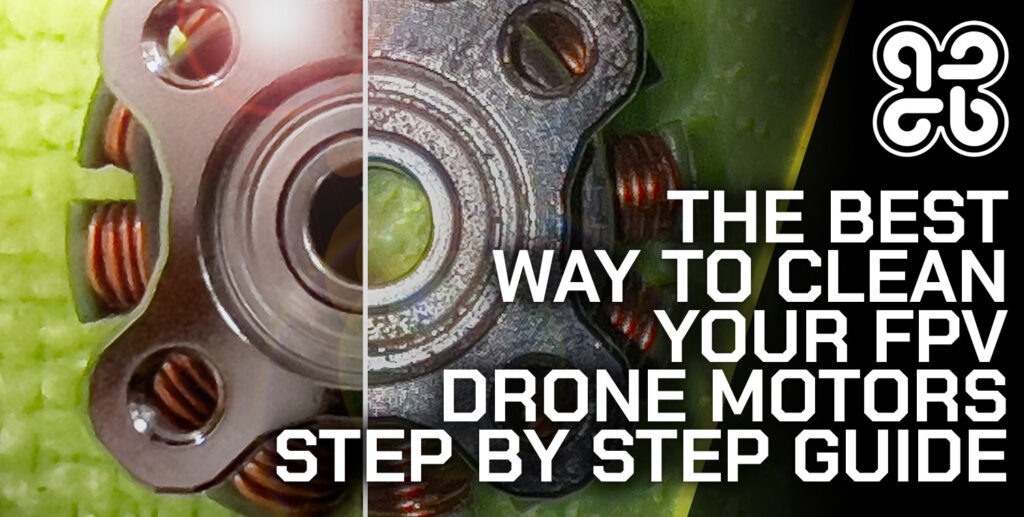
2. Clean the Motors (Externally): This is critical. Dampen a cotton swab or cloth with alcohol.
• Wipe the motor bell and shaft clean.
• Carefully clean the top and bottom motor mounting screws where dirt accumulates.
• Do not pour alcohol directly into the motor bearings. A damp swab around the base is sufficient.
3. Clean the Camera Lens and GoPro: Use a clean, dry microfiber cloth designed for lenses. Breathe lightly on the lens to add a tiny bit of moisture if needed, then wipe in a circular motion. For oily fingerprints, a single drop of alcohol on the cloth can help.
4. Clean the Electronics (Carefully!): With a lightly alcohol-dampened cotton swab or brush, you can gently clean the surfaces of your Flight Controller (FC) and ESC. Focus on removing dirt that bridges connections. Avoid soaking components or connectors.
Phase 3: Specialized Cleaning Scenarios
After a Muddy or Wet Crash:
If the drone is caked in wet mud, you may need to use distilled water first.
1. Use a soft brush and distilled water to gently rinse off the bulk of the mud from the frame and non-critical areas.
2. Avoid directly spraying boards. Pat dry immediately with a cloth.
3. Place the drone in a warm, dry, well-ventilated area (not an oven!) for at least 24-48 hours to ensure all internal moisture is gone.
4. After it is completely dry, perform the alcohol cleaning steps above to remove any remaining residue.
Cleaning Bearings (Advanced):
If a motor feels gritty, the bearings may need service.5. Remove the motor from the frame.
6. Use a dedicated bearing cleaner spray or isopropyl alcohol.
7. Apply a few drops to the top and bottom bearing seals while rotating the shaft.
8. Let it evaporate completely, then apply a tiny drop of light bearing oil (e.g., sewing machine oil) to each bearing shield.
9. Never use WD-40 as a lubricant.
Phase 4: Drying and Final Inspection
Goal: Ensure no moisture remains and the drone is flight-ready.
1. Air Dry: Let the drone sit for 15-30 minutes after using alcohol to ensure all traces have evaporated.
2. Final Visual Check: Look over the entire drone. Are all screws tight? Is the camera angle correct? Are antennas secure?
3. Pre-Flight Bench Test: Without propellers, connect a battery on your bench. Check that all motors spin smoothly via the transmitter, the video feed is clear, and all OSD elements display correctly. Listen for any unusual sounds from the motors.
Post-Cleaning Maintenance Tips
• Reapply Conformal Coating: If you fly in damp conditions and have washed your drone, check your conformal coating. You may need to reapply a thin layer of silicone conformal coating to the FC and ESC to restore waterproofing.
• Lubricate Moving Parts: Check sliding parts like gimbal mounts on your camera (if applicable). A tiny amount of silicone grease can keep them smooth.
• Clean Your Tools: Rinse your brushes and store your cloths clean for next time.
Conclusion: A Clean Drone is a Happy Drone
Integrating a thorough cleaning into your post-flight routine is one of the simplest yet most effective forms of preventative maintenance. It takes only 15-20 minutes but adds countless flights to the lifespan of your components. A clean drone not only performs better and flies longer but also gives you the confidence that a hidden clump of mud won’t cause your next crash. Treat your machine with care, and it will reward you with reliable, high-performance flights for years to come.
{{ commentCount }} Comments
Loading comments...
{{ comment.user.fullname }}
No comments yet. Be the first to comment!