
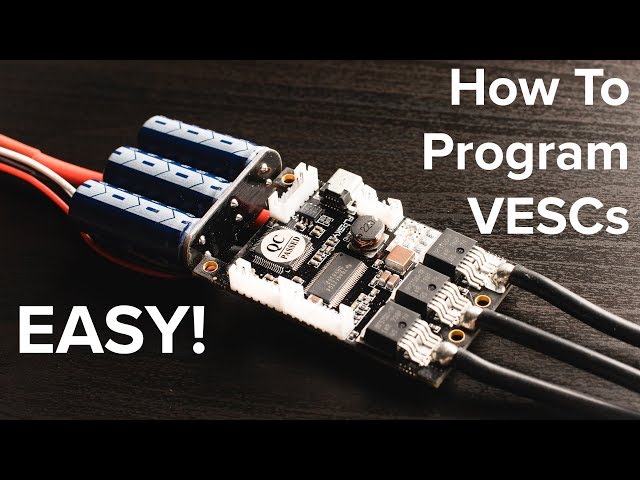
Build your dream electric skateboard from scratch with the power of open-source VESC technology
There's something uniquely satisfying about riding a vehicle you built with your own hands. Building a VESC-based electric skateboard gives you complete control over every aspect of your ride—from how fast you accelerate to how your board handles regenerative braking. With the VESC's open-source architecture, you're not locked into proprietary limitations. This guide walks you through every step, from choosing components to fine-tuning your board for the perfect ride feel.
Why Choose VESC for Your DIY Build?
Unlike proprietary ESCs that hide their settings behind locked firmware, VESC gives you full access to every parameter that affects how your board performs. Field-Oriented Control (FOC) delivers smooth, quiet operation with better efficiency than traditional ESC control methods. High-quality VESC-based controllers also include built-in protections against over-current, under-voltage, and over-temperature—safeguarding your investment from common beginner mistakes.
The open-source nature means the DIY community constantly improves the firmware and shares tuning insights. Whether you want aggressive acceleration curves, precise throttle mapping, or optimized regenerative braking, VESC puts those decisions in your hands, not locked inside a manufacturer's black box.
Component Selection: Building Your Parts List
The Controller: Your Board's Brain
The VESC controller is the most critical component in your build. It converts battery power into the precise alternating current that drives your motors. For a high-performance DIY electric skateboard, here are the leading options available in 2026.
The Flipsky FSESC 6.6 is a popular choice for dual-motor setups, supporting up to 12S batteries with 100A continuous current per motor. It's well-documented and widely used in the community. The MakerX DV6S offers excellent thermal performance, often appearing in premium builds like the Endurance 2.0, where it's paired with powerful 3500W motors.
For those pushing higher voltages, the Spintend Ubox 85V 240A uses an aluminum PCB for superior cooling and is often recommended for 20S builds. The Little FOCer v3.1 has gained popularity for its compact design and 20S capability, though it lacks an integrated heatsink. Some builders pair it with a controller box and thermal pads for effective cooling.
If you're building an all-terrain board or simply prefer the compactness of a single-board solution, dual VESC controllers save enclosure space and simplify wiring. Models like the Flipsky Dual FSESC 6.6 integrate two controllers onto a single PCB, reducing the chance of connection-related failures.
Motors: The Muscle
Most DIY electric skateboards use outrunner brushless motors. The standard size for performance builds is 6374 (63mm diameter, 74mm length), which offers an excellent balance of torque and heat dissipation. Lighter riders may find 6355 motors sufficient, while heavier riders or those tackling steep hills should consider 6384 motors for additional torque headroom.
For street riding on urethane wheels, 190KV motors paired with 12S batteries deliver strong performance across a wide speed range. For off-road builds with pneumatic tires, lower KV ratings (around 149KV) provide more low-end torque for climbing rough terrain.
Battery: The Heart of Your Build
Battery selection dictates your board's range, power delivery, and safety. 12S (50.4V) is the most common voltage for high-performance builds, offering an excellent balance of power and component availability. 10S (42V) works well for lighter builds or first-time builders. 18S or 20S setups deliver extreme performance but require more careful thermal management and compatible VESC hardware.
For batteries, Molicel P42A cells are widely regarded as the gold standard for DIY builds due to their excellent power delivery and thermal characteristics. Samsung 30Q cells are another reliable option, offering good capacity and discharge performance.
When configuring your VESC, your battery current limits must be set lower than your ESC's maximum rating. The ESC won't pull more current than you allow in VESC Tool, so you can safely use a high-C battery pack by properly configuring current limits.
Enclosures and Hardware
A sturdy deck is essential. Bamboo and carbon fiber composite decks strike an excellent balance between weight, flex, and durability. For trucks, wide caliber-style trucks provide stability at higher speeds while accommodating dual motors.
Belt drive systems are the most common choice for DIY builds, offering predictable performance and easy gearing adjustments. Direct drive systems provide a cleaner aesthetic and silent operation but offer less torque for climbing hills.
Step-by-Step Assembly
Step 1: Configure Your VESC on the Bench
Before mounting anything, configure your VESC controllers individually. Connect the first controller to VESC Tool via USB, run the motor detection wizard, and save the configuration. Select "Large Outrunner" as your motor type in the wizard. Then, set your motor maximum current to 65-80A for 6355-sized motors or 80-100A for 6374 motors. Set your battery maximum current to 45-60A per ESC depending on your battery pack's capabilities.
After configuring the first controller, connect the second via CAN bus. In VESC Tool, set unique CAN IDs for each controller to ensure proper communication. Power-cycle both controllers after writing your settings to apply the changes.
Step 2: Build the Mechanical Assembly
Mount your motors securely using motor mounts. For dual-drive boards, ensure both motors are positioned identically before fully tightening them. Pay careful attention to the belt tension—too loose and you'll slip under load, too tight and you'll wear bearings prematurely.
Mount your battery pack in the enclosure using foam padding or Velcro straps to prevent movement during riding. Use anti-spark connectors like AS150 for the main battery connection to prevent damaging arcs when plugging in.
Route your wiring cleanly, using cable management solutions to keep everything secure. Ensure all connections are tight and that wires cannot contact moving parts. Use XT90 or XT150 connectors for high-current connections.
Step 3: Wire the Electronics
Connect your motors' phase wires (yellow, blue, green) to the ESC outputs. If using sensored motors, connect the hall sensor harness as well—note that hall sensor wiring order may vary between motor brands, so verify the pinout.
For dual VESC setups, Y-wire the power switch to both controllers and connect the CAN bus between them. Connect your receiver to the designated input on one controller—it will communicate with the other via CAN.
Finally, secure all components in your enclosure, ensuring nothing moves or shorts against the enclosure walls. Use heat shrink on all solder joints and consider strain relief for wires exiting the enclosure.
Step 4: Final System Configuration
After confirming basic motor function, you can refine your VESC settings for ideal ride characteristics. Within VESC Tool, adjust throttle and brake curves to match your preferences, and set motor current maximum between 65A and 100A per motor depending on your hardware. Configure battery current maximum between 45A and 60A per controller, and set your voltage cutoffs to 3.0-3.4V per cell for safe battery protection.
For firmware version 6.05, enable "Short Low-Side FETs on Zero Duty" for stronger standstill braking and set "Speed Tracker Position Source" to "Corrected Position" for optimal safety.
Before your first ride, perform a comprehensive safety check. Run the motor detection wizard again for both controllers, test your remote connection thoroughly, and check all bolts and fasteners for tightness.
Fine-Tuning Your Ride
The beauty of VESC is how much you can customize your ride feel through software. Adjusting acceleration curves changes how responsive your board feels—gentler curves smooth out the initial throttle input, while aggressive curves deliver instant power.
Setting appropriate current limits protects both your VESC and motors from damage. The controller actively watches current flow, and if it surpasses your motor current maximum, it reduces duty cycle to prevent overheating.
Monitoring temperatures during the first few rides is essential—if your controller or motors exceed 75-80°C during normal riding, consider reducing your current limits or improving your cooling system.
Many advanced builders reduce the observer gain value by roughly half from the detected result to improve low-speed stability, and they set the observer type to FOC_OBSERVER_ORTEGA_ORIGINAL for best performance with common outrunner motors.
Common Issues and How to Fix Them
If your motor stutters during detection, lower your detection current temporarily to 10-20A. If your board cuts out under heavy acceleration, this often indicates your battery current limit is set too high for your battery pack's capabilities.
Motor detection failing after a firmware update is common—simply re-run the detection wizard. If your motors run hot during normal riding, reduce your motor current limits or upgrade to larger motors. For encoder or hall sensor issues, verify your sensor wiring order matches your motor's pinout specifications.
If your VESC fails to connect to VESC Tool, first check your USB cable—many micro-USB cables are power-only. Ensure your VESC is powered by at least 8V (USB alone is insufficient unless your board has a separate 5V regulator). As a last resort, try entering bootloader mode by holding the button on the VESC while connecting.


{{ commentCount }} Comments