
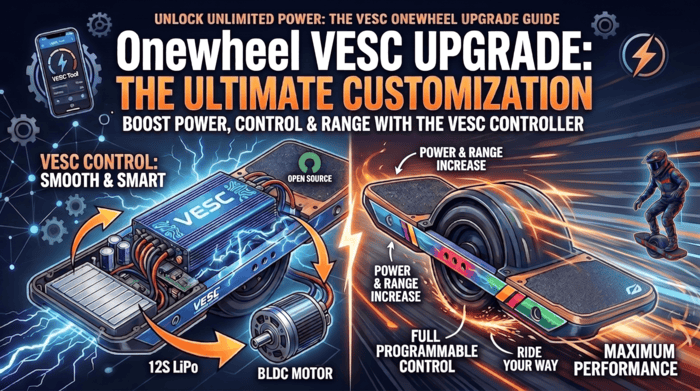
Unleash your Onewheel’s full potential — ditch the proprietary limits and ride on your own terms
VESC-ing your Onewheel is the single most transformative upgrade you can make to your board. By replacing the locked-down Future Motion controller with an open-source VESC (Vedder Electronic Speed Controller), you gain complete control over power delivery, tuning, and repairability. Whether you want to push speed limits, dial in perfect carving feel, or simply future-proof your ride, this guide walks you through everything you need to know.
Why Upgrade to VESC?
Switching to VESC unlocks what stock Onewheels intentionally lock away:
• Massive Power Gains: The Floatwheel XRV kit boosts XR power from 2500W to 4200W — a 68% increase — and can reach 5200W with an upgraded MTE hub n52 motor. The GTV kit pushes GT output from 2800W to 4200W, surpassing the GT-S stock 3800W.
• True Customizability: Fine-tune acceleration curves, braking sensitivity, voltage thresholds, and current limits. Create multiple performance profiles for different terrains: carving, trail riding, or commuting.
• Full Right-to-Repair: Stock controllers are proprietary and paired to their BMS, making repairs expensive or impossible. VESC systems use modular, off-the-shelf components you can source and replace yourself.
• Better Efficiency: VESC power stages have lower RDS(on) and produce less heat than stock controllers, often improving range under the same riding style.
• Aftermarket Compatibility: Configure pitch angle offsets to run any aftermarket rails. Adjust pushback thresholds. Connect Bluetooth telemetry for real-time monitoring via VESC Tool.
• Access to Latest Firmware: Run ReFloat—Onewheel-specific VESC firmware—with continuous improvements from the open-source community, including enhanced IMU stability and advanced tuning features.
Two Upgrade Paths: Choose Your Level
Path 1: Drop-in Power Kits (Beginner-Friendly)
Floatwheel offers complete, pre-programmed kits designed to fit directly into stock enclosures:
XRV Kit | Onewheel XR | 2500W → 4200W | Plug-and-play, pre-tuned software, brighter light bars, CBXR support, 100% right-to-repair |
GTV Kit | Onewheel GT | 2800W → 4200W (surpassing GT-S) | Same torque as GT-S, 24% more range than GT-S, redesigned motor plug prevents burnt connectors, 10-minute install |
Both kits include replacement ESC, charge-only BMS with balancing, front and rear lights, and all installation tools (except pliers). No VESC Tool configuration is required — the software comes pre-tuned by the community’s “VESC whisperer.” |
Path 2: Full DIY Build (Experienced Only)
Building a custom VESC system gives you total component choice but demands technical skill. Typical steps include:
• Choose Components: Select VESC controller based on your voltage goals and space constraints, plus battery, BMS, motor (Hypercore stock or aftermarket like Cannon Core/Superflux), enclosures, footpads, sensors, wiring, connectors, and accessories like lights with buck converters.
• VESC Controller Options (mid-2025 onward):
• Little FOCer v3.1 (84V, 20S, 180A peak): Compact and affordable, but lacks built-in heatsink and struggles to power LEDs directly
• Ubox 100V (100V, 22S, 100A motor): Good starter, includes built-in heatsink and BLE module, but not a high-performance option
• Thor300/Thor301/Thor400 (Fungineers): High-performance with powerful MOSFETs, especially the 32S-capable Thor400, but lacks integrated heatsink and requires lid-mounting with thermal pads or custom enclosure
• ZESC Raiden 7: Virtually impossible to overheat when mounted in a Fungineers aluminum controller box, with bigger MOSFETs than the 250-series
In the enthusiast community, the Little FOCer is often considered a better choice than the Spintend Ubox for fitting into The Float Life controller box.• Wire Everything: Carefully connect motor phase wires (6-pin with two blues, two yellows, two greens), hall sensors (circular connector: yellow, green, blue hall wires + white temperature, black ground, red 5V positive), power, and controls.
• Install IMU: Mount the inertial measurement unit securely, aligning axes with the board’s pitch, roll, and yaw orientation. Fix it in place without any movement to ensure accurate balance calibration.
• Configure in VESC Tool: Run motor wizard, calibrate IMU, set battery limits, and fine-tune parameters.
⚠️ Warning: Full DIY builds involve soldering, custom programming, and component sourcing. If any of those tasks feel daunting, choose a drop-in kit instead.
Software Setup: From Hardware to Hover
Once the hardware is installed, VESC Tool is your control center for configuration. The initial setup follows this sequence:
1. Run Motor Wizard – Auto-detects motor parameters (resistance, inductance, flux linkage, observer gain). For firmware 6.05+, enable "Short Low-Side FETs on Zero Duty" for stronger standstill braking and set "Speed Tracker Position Source" to "Corrected Position."
2. Install ReFloat Package – The Onewheel-specific balance package, replacing the generic VESC Balance App. Accessible via VESC Tool's Packages tab with usable default values that work out of the box.
3. Calibrate IMU – Use the IMU Wizard (VESC Tool 6.02+). Follow the three-part process: gyroscope calibration (board completely still), accelerometer calibration (board leveled), and orientation calibration (specify roll offset and yaw offset). For Little FOCer v3.1 users, the yaw offset should register ±90° or 270°.
4. Set Battery Limits – Configure voltage cut-offs to protect your pack from over-discharge, and tilt-back thresholds to indicate full charge or low battery conditions.
5. Test Thoroughly – Before riding, perform a hand test: lift the board and slowly apply throttle while monitoring for unusual noises or behavior.
6. Test Ride – Once the hand test passes, move to an open, soft surface for your first actual ride.
💡 Pro Tip: Always back up your configuration before experimenting with advanced settings (Start tab → Backup Configuration).
Fine-Tuning Your VESC Onewheel
Beyond basic calibration, VESC Tool unlocks advanced tuning capabilities:
• Real-time Data Monitoring – Live telemetry of battery voltage, motor current, RPM, MOSFET and motor temperatures help identify hotspots or performance bottlenecks during rides.
• Throttle Curves – Adjust the relationship between footpad input and motor output to achieve desired acceleration and braking response — from aggressive to buttery smooth.
• Field Weakening – Allows higher top speeds by reducing motor flux at high RPMs. Configure with caution; excessive settings can overdraw current.
• Firmware Updates – VESC Tool can flash new firmware versions, giving you access to community-developed improvements like ReFloat Extras. v6.06 introduced IMU communication speed upgrades to 700kHz (fast) and a 1200Hz sample rate for LSM6DS3-equipped controllers, plus the ability to completely disable motor/MOSFET temperature throttling (precautionary).
• Data Logging – Record ride parameters for analysis and iterative tuning.
• Tuning Profiles – Create multiple configurations for different terrains using VESC Tool or the Floaty app.
Common Pitfalls & How to Avoid Them
Nosedive from temp sensor noise | Focer 3.1 + Ennoid V4 BMS: battery thermistors prone to noise, spiking temp readings to 98°C+ for seconds, triggering VESC to cut power. | Disable temperature and SOC limits on VESC when using CAN bus between VESC and XLITE. Addressed in v6.05 (now off by default). |
FAULT_CODE_DRV with LEDs | Float Package assigns CPU pin B7 as LED data pin, but on most VESCs that pin is tied to MOSFET driver fault. | Use ReFloat instead, which correctly assigns B6 as servo pin with an option to adjust. |
Board shuts off unexpectedly | May indicate battery issue (low SOC or under-voltage). | Configure conservative voltage cut-offs; keep VESC BMS and XLITE firmware updated to improve SOC accuracy. |
Motor detection fails or whines | Motor parameters exceeding VESC limits; large hub motors sometimes problematic. | Hand-test carefully before final ride; reduce current limits temporarily for detection. |
IMU calibration fails | Board moves during calibration; incorrect orientation or yaw offset. | Ensure board completely still; use milk crate to hold level; redo wizard from scratch. Verify gyro output near zero when stationary. |
Performance You Can Expect
Motor Power (XR) | 2500W | 4200–5200W (depending on hub) |
Motor Power (GT) | 2800W | 4200W (GT-V kit) |
Top Speed | Limited by FM firmware | ~35+ mph (limited by motor/battery) |
Torque | GT-S level | Equivalent or better |
Range | Stock | Similar or slightly better (more efficient power stage) |
Customization | None (locked parameters) | Full control (curves, limits, profiles) |
Repairability | Proprietary, paired parts | Modular, off-the-shelf components |
VESC Onewheel FAQ
Q: Is VESC-ing my Onewheel legal?
A: VESC upgrades are legal, but they void your warranty. As a "right-to-repair" modification, you assume full responsibility for safety and compliance.
Q: What's the real-world top speed with VESC?
A: The Funwheel X7 (built on the XR platform) achieves 35+ mph (56+ km/h), demonstrating the upper potential — though actual top speed is limited by your motor, battery health, and weight.
Q: How much battery range will I lose?
A: Under the same riding style, range remains similar or slightly improves due to the VESC's more efficient power stage. However, aggressive riding enabled by extra power will naturally drain batteries faster.
Q: Which Onewheel models can be upgraded?
A: XR and GT have dedicated drop-in kits (XRV and GTV). Pint and older models require custom DIY solutions. Older V1, Plus, and early Pint have varying degrees of support in the community.
Q: What's the best VESC controller for beginners?
A: Start with an XRV or GTV drop-in kit — zero manual tuning required. For DIY, Little FOCer v3.1 is affordable and compact, while Thor series offers high-end power handling.


{{ commentCount }} Comments